One-click Upsells
Offer an add-on right after checkout that buyers accept with a single click, charged to the card they just used.
A one-click upsell flow shows the buyer an offer immediately after they pay. If they accept, the add-on is charged to the card they just used and added to their order. No second checkout form, no re-entering card details. Whether they accept or decline, they then land on your thank-you page.
You share one link. CheckoutJoy runs the checkout, the upsell page and the redirect behind it.
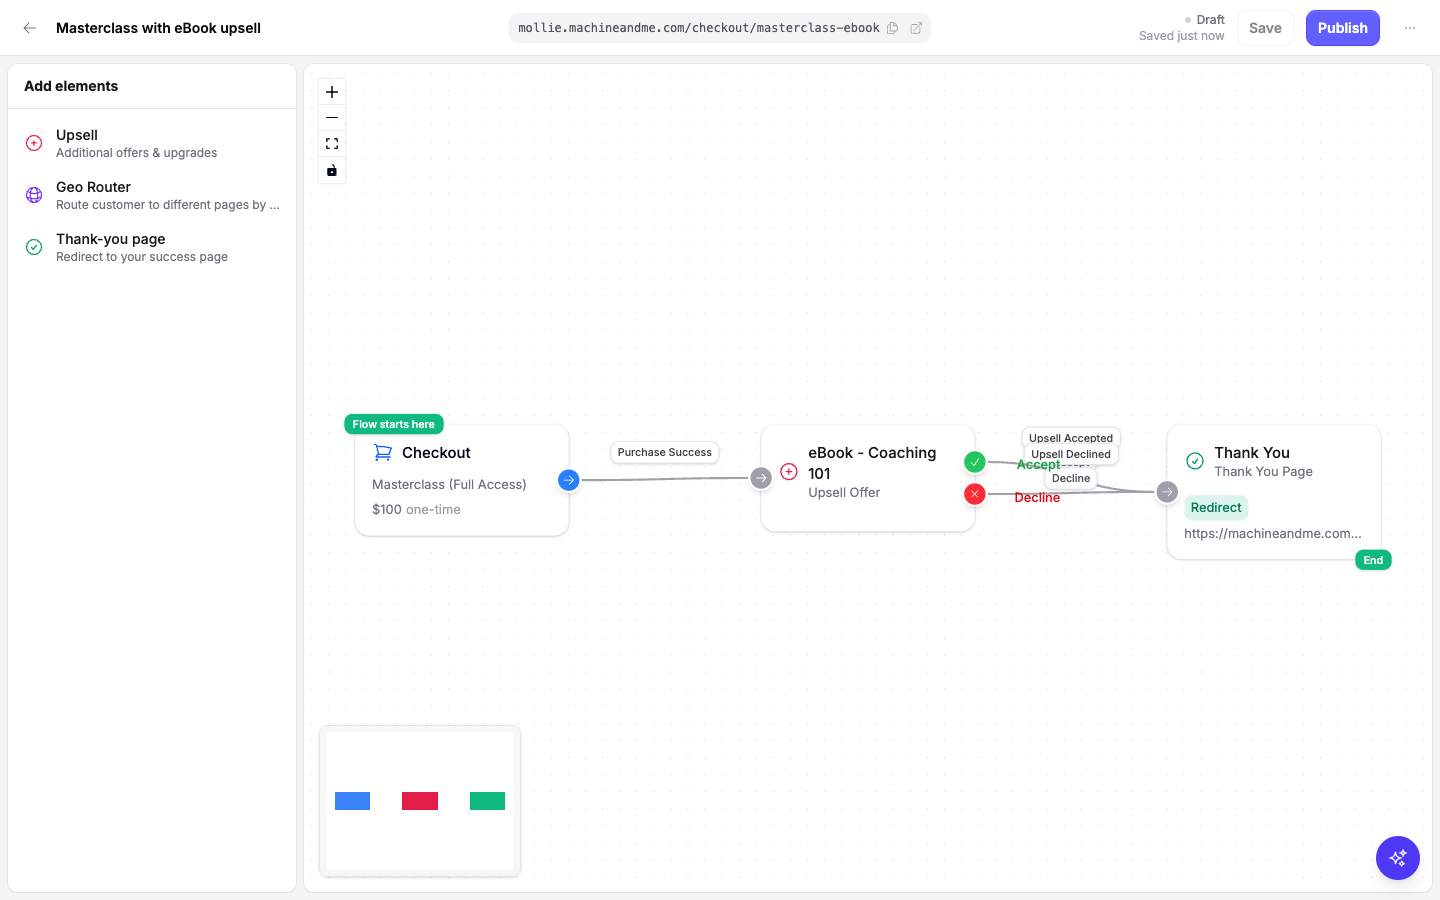
How it works
A one-click upsell flow is built from three elements:
| Element | Purpose |
|---|---|
| Checkout | The starting point. A hosted checkout for your main product. |
| Upsell | An upsell page for the add-on offer. The buyer sees it right after paying. |
| Thank-you page | Where the buyer is redirected after accepting or declining the upsell. |
When the buyer pays on the checkout, CheckoutJoy asks the payment processor to keep the card on file for this purchase. The upsell page then appears at the same link. Clicking the accept button charges the upsell price to that card and adds the product to the order. Clicking decline skips it. Either way the buyer is sent to your thank-you page.
The accepted upsell is added to the same order as a separate line item, with its own payment. It shows up on the order in your dashboard like any other product, and the buyer gets access the same way they would for a normal purchase.
An upsell is different from an order bump. An order bump is a checkbox on the checkout form, paid together with the main product. An upsell is a separate page shown after payment, charged separately with one click.
Requirements
- The checkout uses Stripe, Paystack or PayFast. These are the processors that can charge a stored card for the upsell.
- The upsell offer is a once-off product. Only once-off products can be selected as an upsell.
- The main product is a once-off product. Subscriptions and payment plans are not supported as the main product of an upsell flow.
Processor-specific notes:
- Stripe: nothing extra to set up.
- Paystack: inside an upsell flow the checkout accepts card payments only, because only a card authorization can be charged again. Other Paystack channels are not offered on that checkout.
- PayFast: Recurring Billing must be enabled on your PayFast account, and your PayFast passphrase must be set on the PayFast processor in CheckoutJoy. The checkout accepts card payments only, in ZAR.
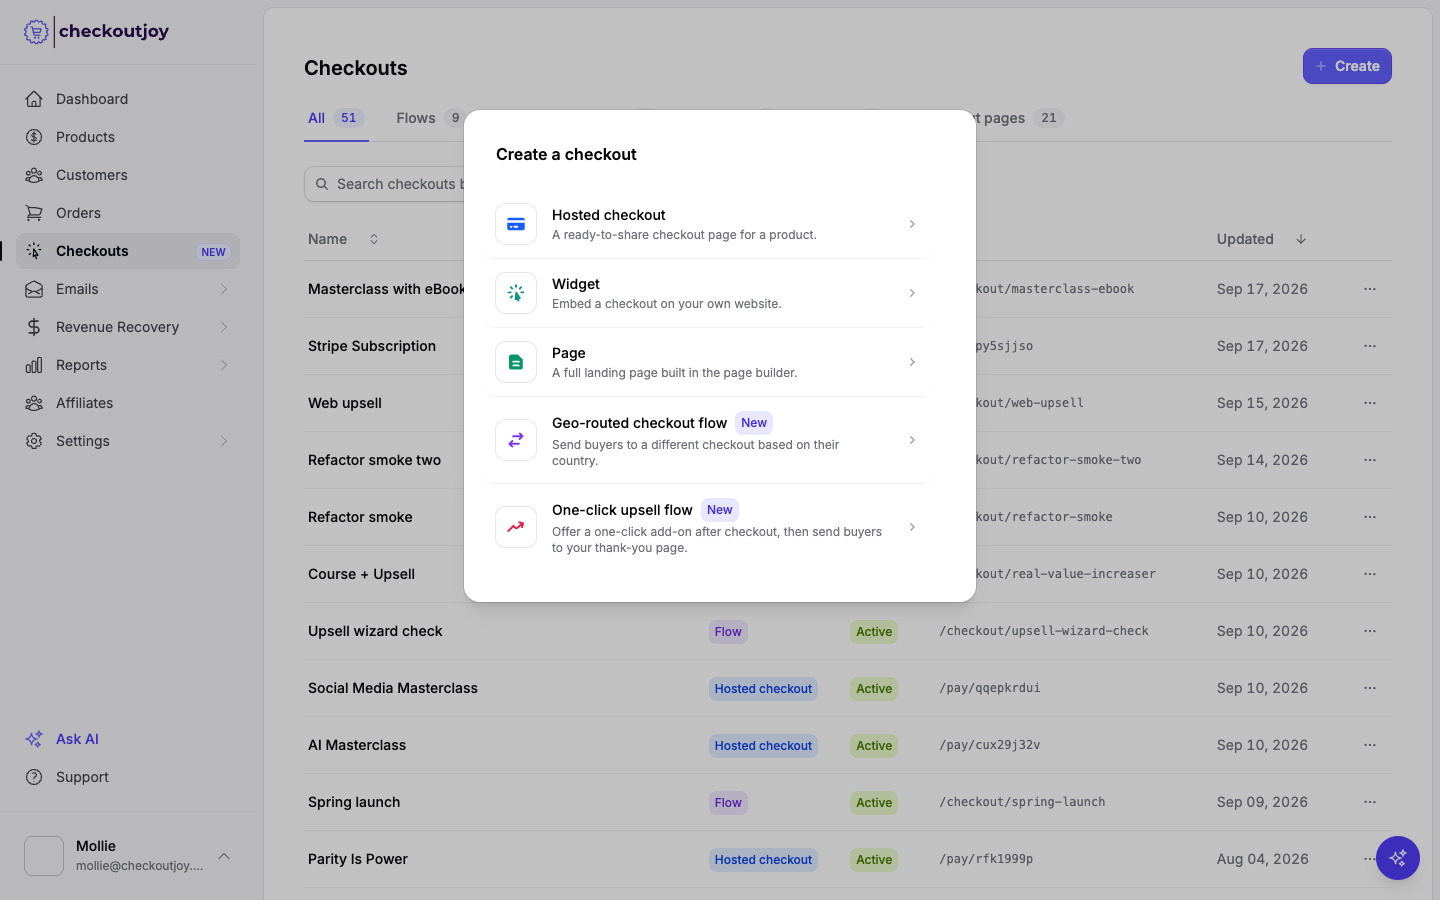
The One-click upsell flow option in the Create dialog is unavailable until one of these processors is active on your account.
If the checkout offers a processor that isn't listed above, buyers who pay with it never see the upsell. Their order is completed without it and they are sent straight to your thank-you page. Limit the checkout's payment options to Stripe, Paystack or PayFast.
Creating a one-click upsell flow
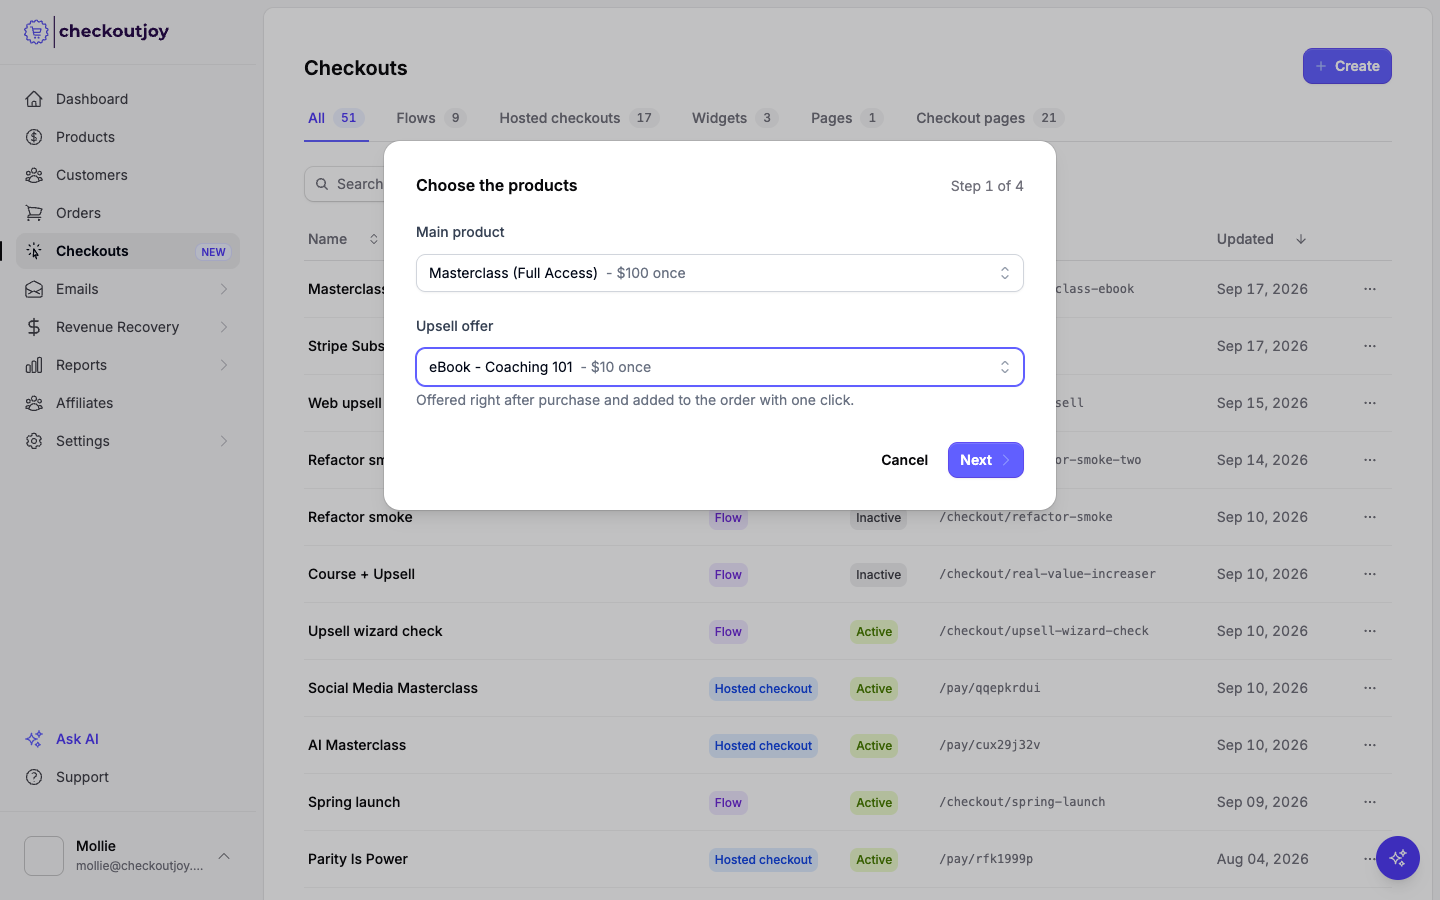
Choose the products
Select the Main product the buyer pays for on the checkout, and the Upsell offer shown after payment. The upsell list only contains once-off products.
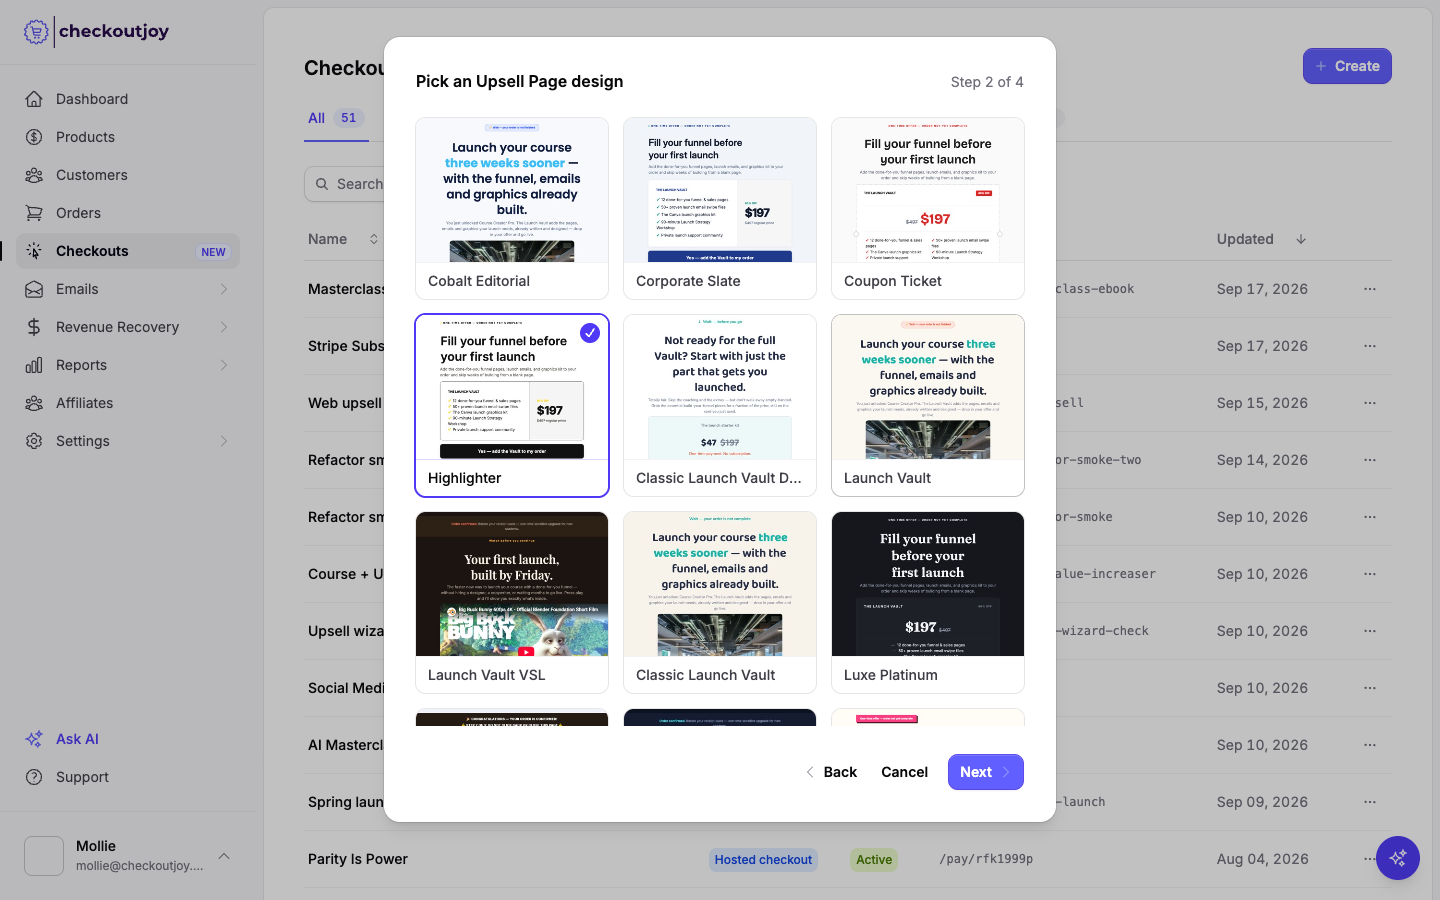
Pick an upsell page design
Choose a template for the upsell page. Every template includes the offer name, price, an accept button and a decline link. You can change the design later in the page builder.
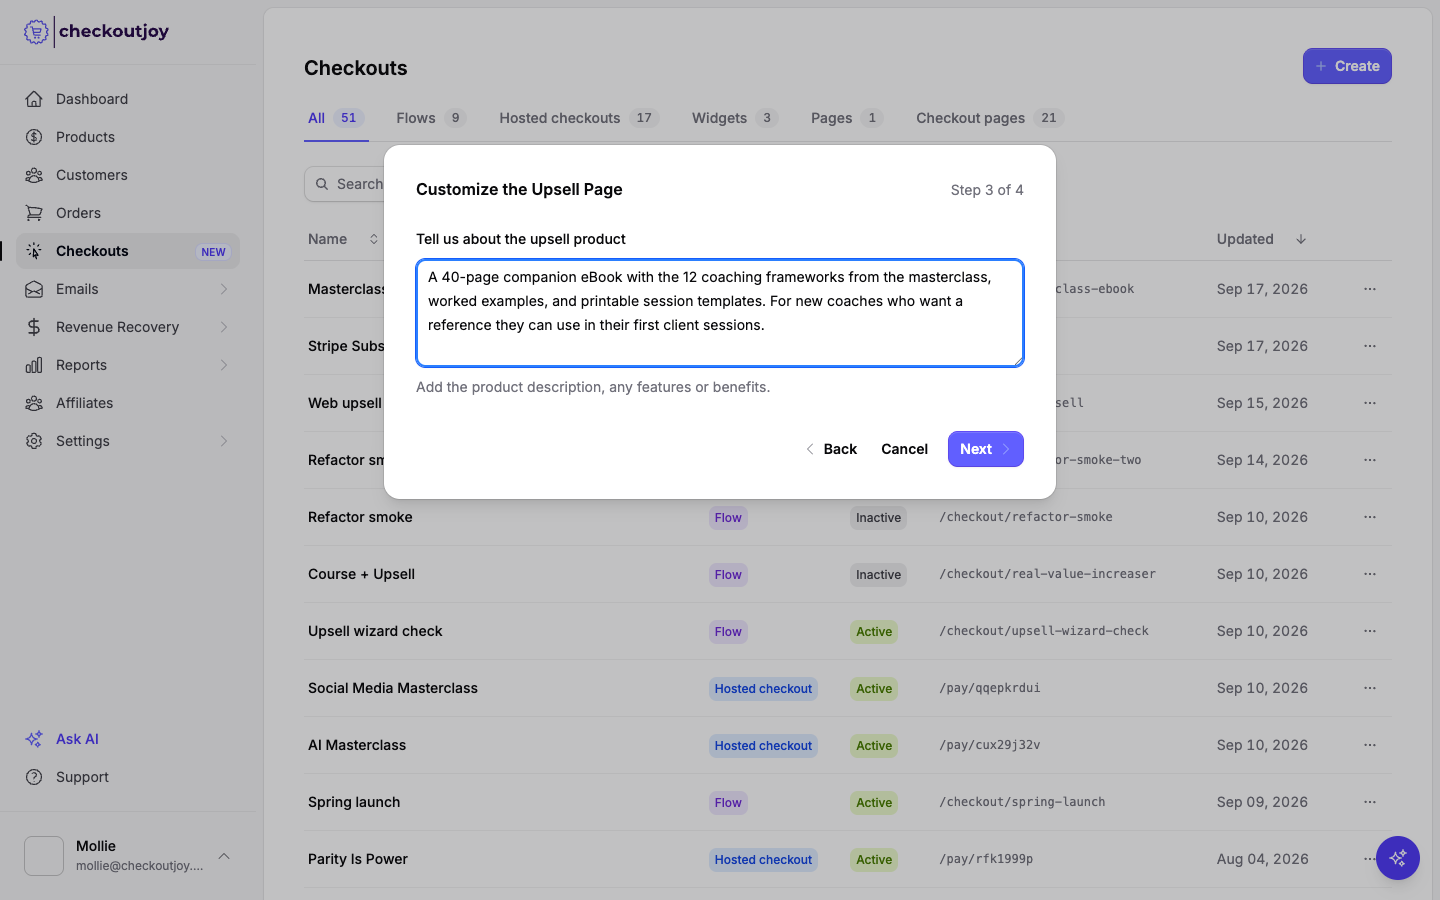
Describe the upsell product
Tell CheckoutJoy what the add-on includes, who it's for and what result they get. CheckoutJoy writes the page's headline, description and benefit list from these notes and your product details. This step is optional. Leave it empty and the page is created with the template's starter copy.
Name the flow and set the thank-you page
Give the flow a name, choose its link, and enter the Thank-you page URL. This is where buyers land after accepting or declining the upsell.
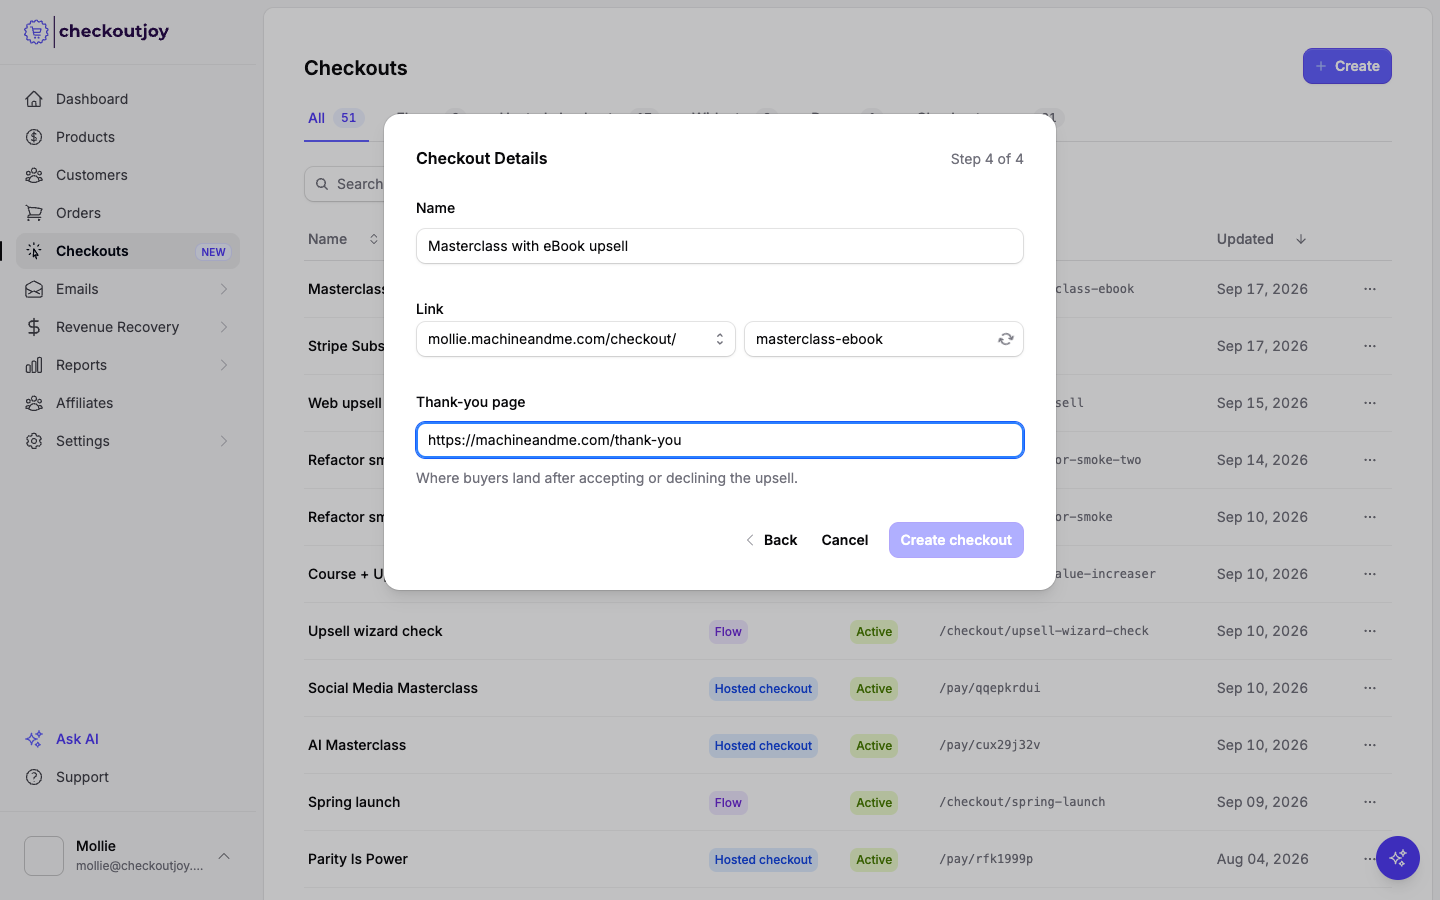
Click Create checkout. CheckoutJoy writes the upsell page, creates the flow and opens it in the flow builder.
Publish
Click Publish. Share the flow link. The link is shown at the top of the flow builder, with a copy button next to it.
Until you publish, the flow is a draft and the checkout at that link runs without the upsell.
The upsell page
Click the Upsell element in the flow builder to see which page it shows. From here you can open the page in the builder, switch to a different upsell page you've already made, or start over with a new one.
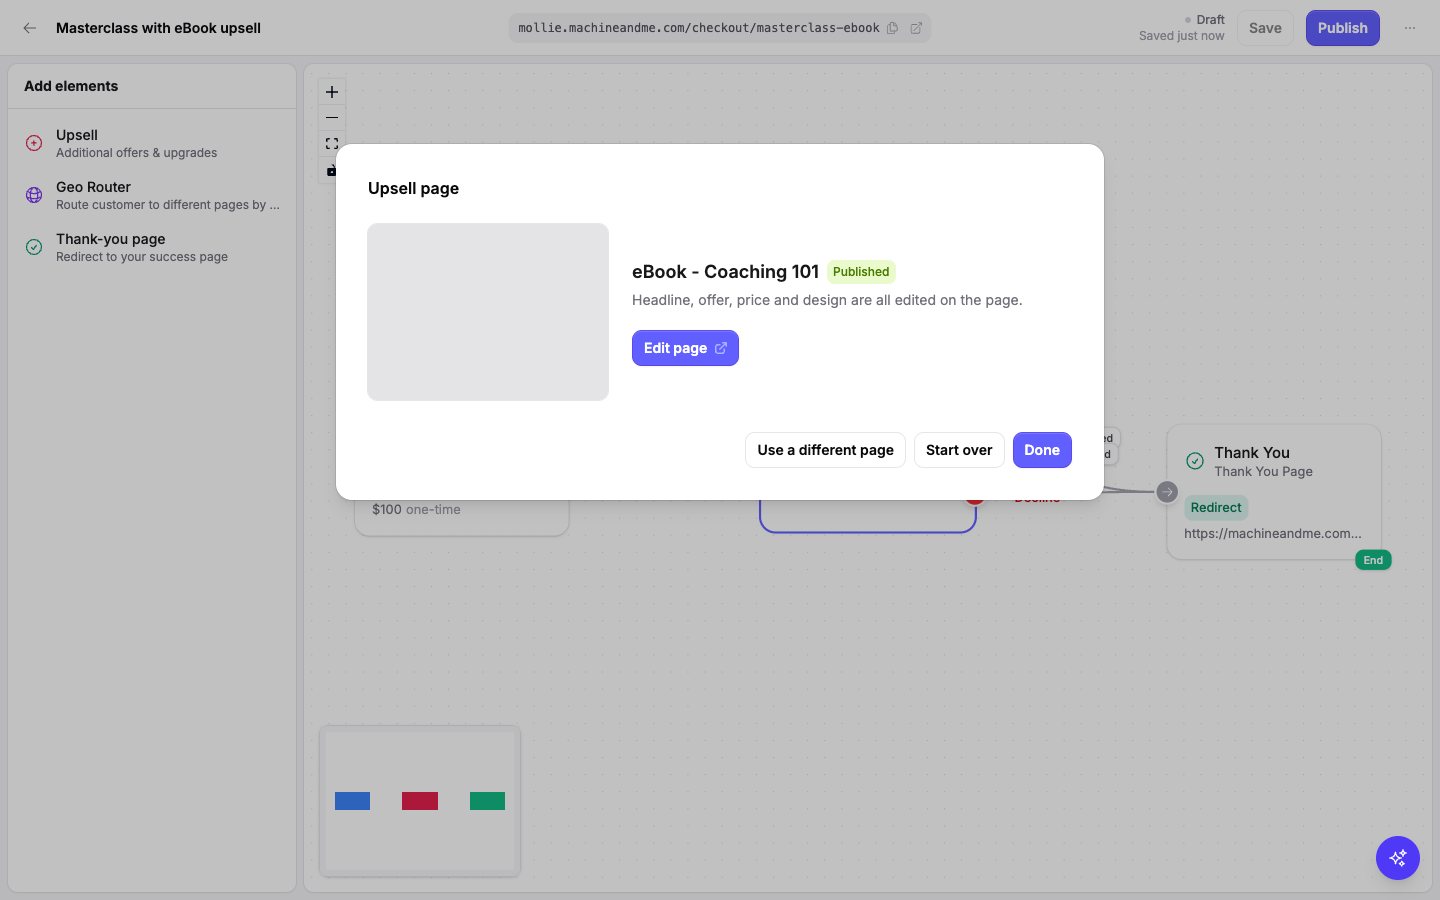
Edit page opens the page builder. The headline, benefits, price display, buttons, colours and fonts are all edited here. The Upsell Offer field on the builder's Settings tab sets which product is added to the order when the buyer accepts. Use Publish in the builder to make your edits live.
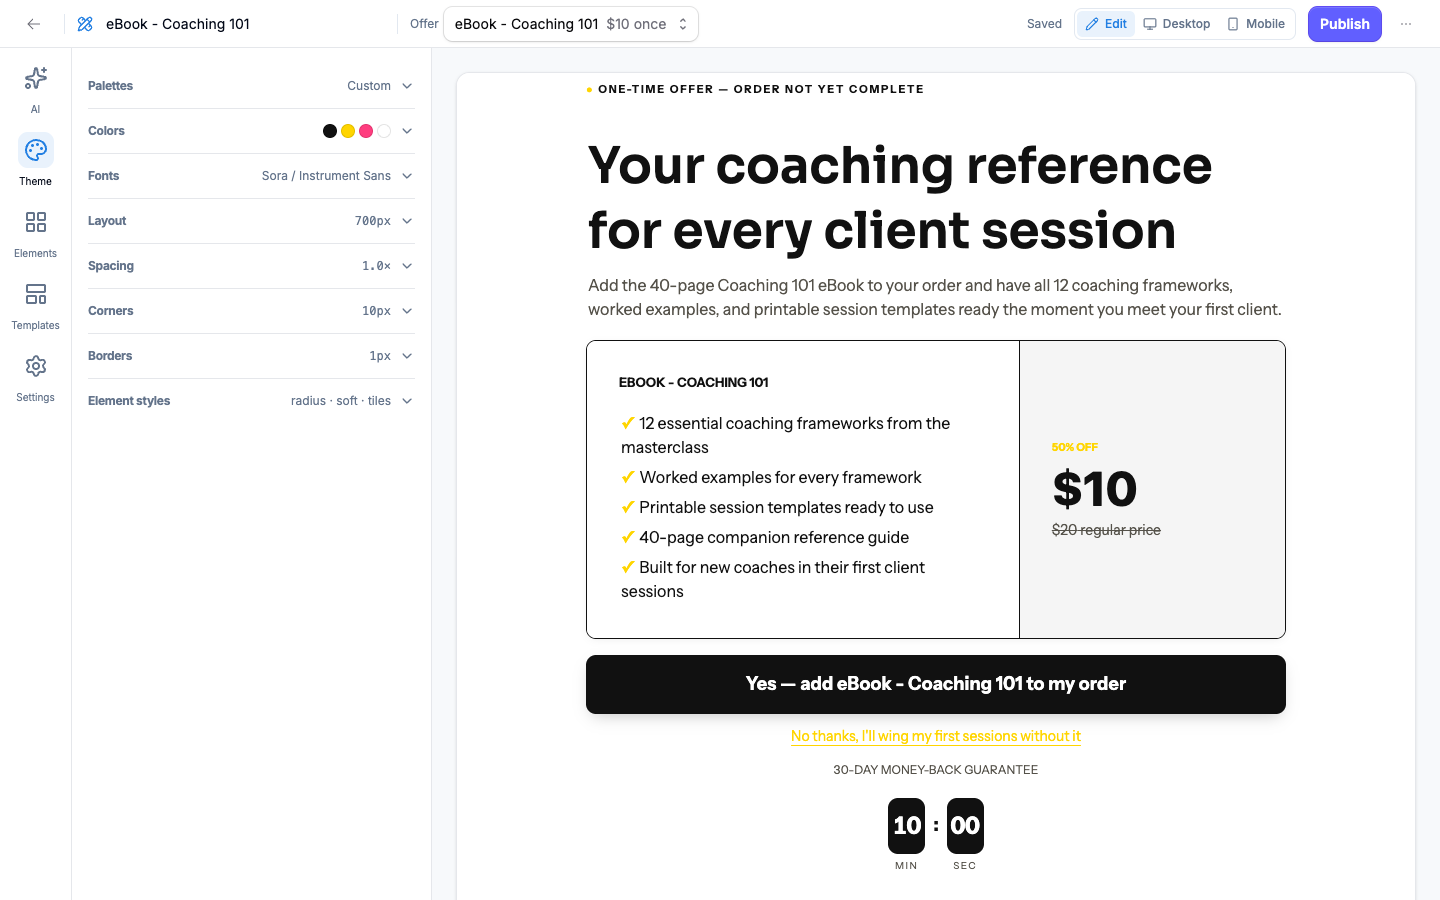
The AI tab rewrites the copy from new notes. The price shown is always the offer's price; AI never writes it.
A new upsell page also shows a crossed-out compare-at price of twice the offer price, with a "regular price" note and a "50% OFF" label. These are placeholders. Change or remove them in the page builder before publishing if they don't reflect a real price.
What the buyer sees
After paying, the buyer is taken to the upsell page.
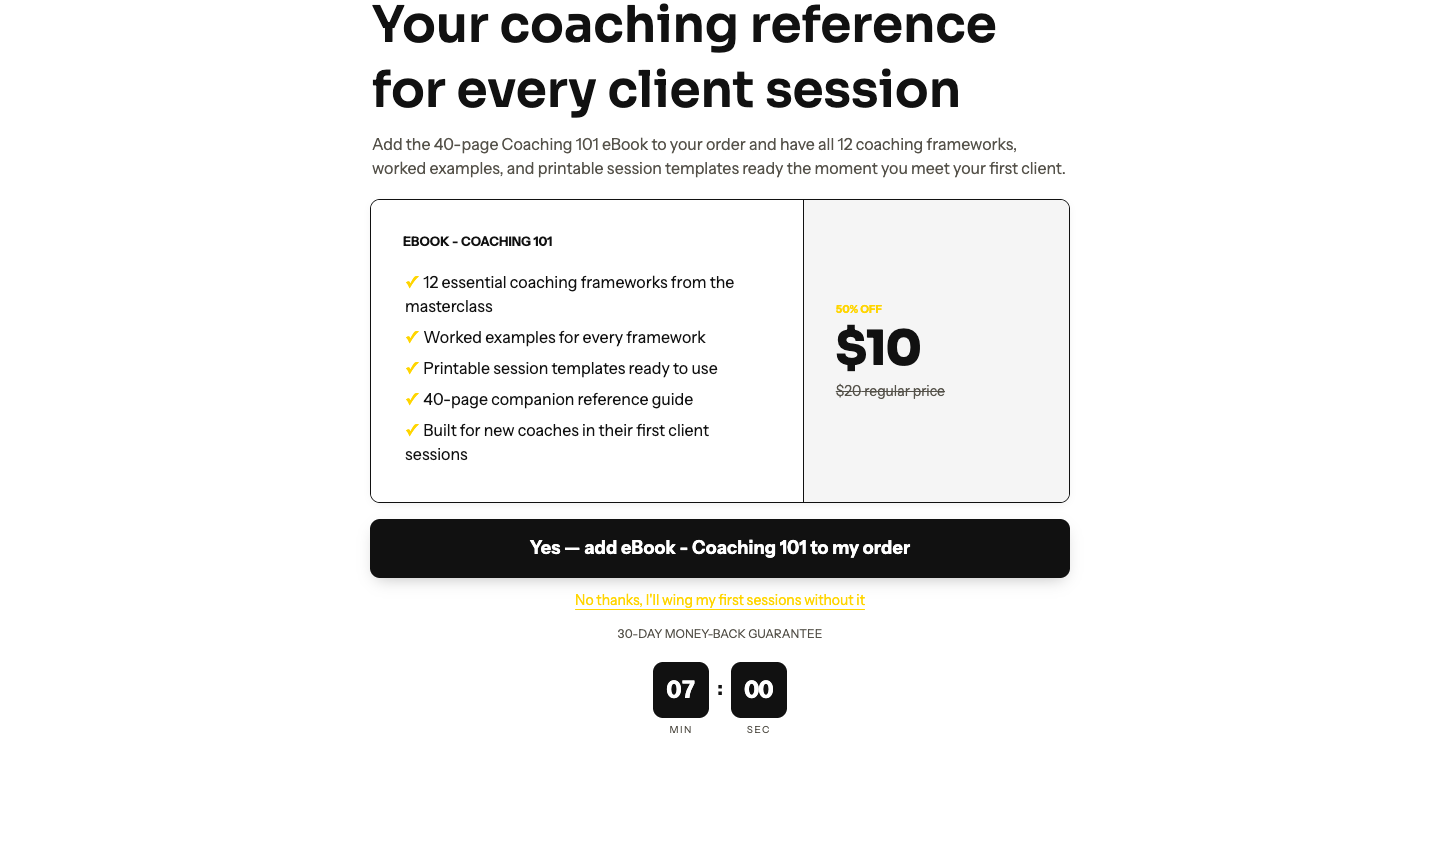
- Accept charges the upsell to the card used on the checkout and adds it to the order. The buyer is then sent to your thank-you page.
- Decline sends the buyer straight to your thank-you page.
Each offer can be accepted once. If the charge fails, the buyer sees an error on the page and is not charged for the upsell. About 75 seconds later the upsell is closed and the order is completed without it. Reloading the page does not charge the buyer twice.
If the buyer neither accepts nor declines within 15 minutes, the order is completed without the upsell.
Adding more than one upsell
You can chain upsells. In the flow builder, add another Upsell element from the left sidebar and connect it to the Accept or Decline handle of the first one. Each Upsell element has its own page and its own offer. Connect the last upsell's accept and decline handles to the Thank-you page.